 Glyphfield
Getting started
Open the Glyphfield Studio, create or copy a brand project, fill in its identity, compose a first design in Design Lab and export it as a file.
Open the Studio
The Studio is Glyphfield's visual workspace. Use the hosted Studio at glyphfield.com/studio, or run it on your own computer:
pnpm install
pnpm dev
The local Studio runs at http://localhost:3012/studio. The repository uses pnpm 11. Self-hosting describes production builds.
1. Choose a project
A project holds one brand identity and the work of every tool. Open projects appear as tabs above the tool. The Projects menu sorts them into four folders:
| Folder | Contents |
|---|---|
| All projects | Every project in this browser |
| Templates | The Starter identity, original Glyphfield work to start from |
| My brands | Projects you create, copy or import |
| Examples | Reference identities for Basement, General Translation, Ramp, Mintlify, Tailwind CSS, Vite+, Cloudflare and Stripe |
Closing a tab closes its view only. The project stays in Projects. You can edit a built-in project in place and later restore its shipped version.
The + button beside the tabs (Add brand project) opens New project. A project is a brand, and every tool in it uses that brand, so the menu starts with the brand.
Start a brand
- Set up with your agent creates an empty brand and opens Set up with agent in Brand identity. Copy the prompt into a coding agent such as Claude Code, Codex or Cursor. The agent reads the brand's website, repository or design files and fills the identity for you. Brand setup with an agent describes the whole run.
- Blank brand creates an empty brand and opens its overview, where you fill in the name, logos, colors and type yourself.
- Copy a reference brand copies one of the nine built-in identities into a new project named
<Name> copy 1. The number rises if that name is taken.
Start with a file
- Blank design and Blank animation create a new project with an empty brand and an empty Design Lab canvas or Animation timeline. Set up the brand later from Brand identity.
- Import project… opens a
.glyphfield.jsonproject file of up to 128 MB as a new project. The browser validates the file and opens it in Design Lab or Animation. An invalid file shows an error and creates nothing.
Most new brands should start with the agent. Every tool reads the identity: logo files for light and dark surfaces, colors with their roles and contrast pairs, font files, voice and strategy. By hand, that means finding each hex value, font license and logo variant yourself. The agent copies them from the sources the brand already publishes, notes where each value came from, and runs the brand health audit before you keep the result.
Project → Duplicate active project copies the identity, the current work in every tool, assets and saved checkpoints. The copy includes edits that are still waiting to autosave. It opens in a new tab and does not share state with the original. If the copy fails, an Error button (Could not duplicate project: show details) explains the cause.
The Browser API (window.glyphfield.studio) reaches only the controls of the active tool, so it cannot open Add brand project. A browser automation tool clicks Add brand project by its accessible label and then the menu item. For a file chooser, it provides a File built from bytes it is allowed to use. In Brand identity, the Browser API action identity.project.create creates a project directly. After a project opens, wait for the glyphfield:studio-api-ready event, then call readSource() before editing.
2. Set the identity
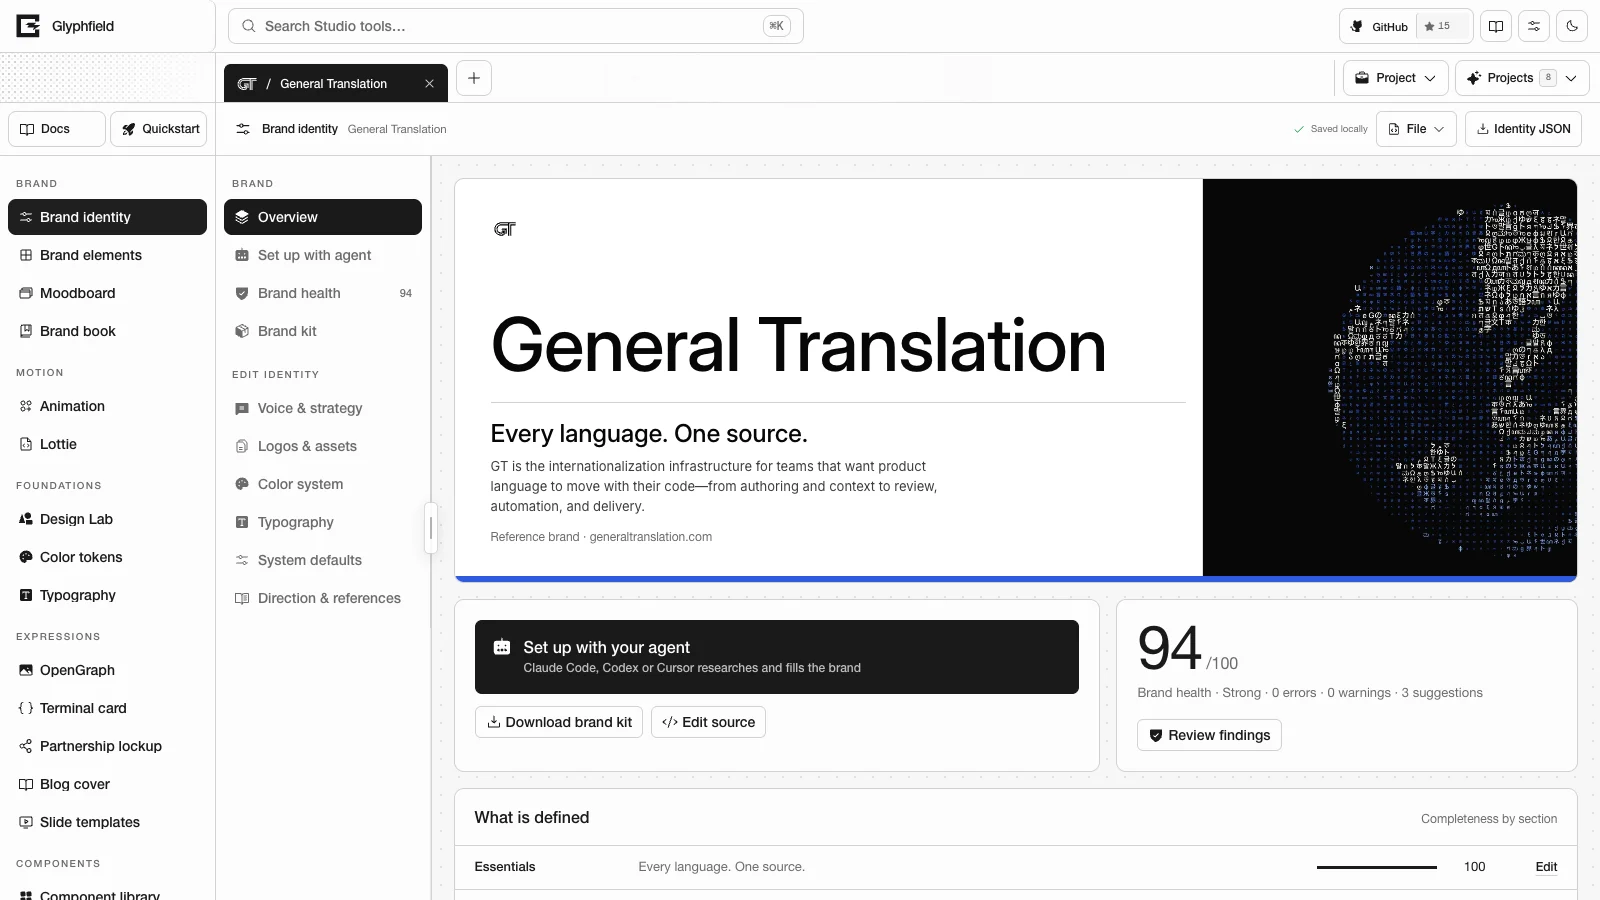
For a new brand, start with Set up with agent in Brand identity. Copy its prompt into Claude Code, Codex or Cursor running with a browser it can drive, such as Playwright, and point it at the brand's website, repository or design files. The agent fills the six editors below through the Browser API, adds the logo and font files, and runs the brand health audit. You then review the score and the sources it cites before you keep the identity.
To fill the identity in by hand, open Brand identity. Overview shows the brand cover, the brand health score and what the identity defines. The editors are:
| Editor | Contents |
|---|---|
| Voice & strategy | Challenge, concept, promise, outcome, pillars, personality, voice principles and examples, audiences, products, proof, customers and sample content for templates |
| Logos & assets | Five logo slots, the asset library with licenses and sources, and the conversion library |
| Color system | Palette colors with their shares and the declared text pairs |
| Typography | Font files, the Display, Body, Accent and Code roles, and the type scale |
| System defaults | Density, corner radius, logo scale, the graphic device, the pattern and the system rules |
| Direction & references | The art direction dossier, applications and references |
Brand health lists missing or failing items, many with a one-click fix. Brand kit downloads tokens and guidelines for use in code. Every tool reads the saved identity, so a change here appears in boards, the brand book, templates, components, motion and Design Lab defaults. Brand identity describes each editor.
3. Find a tool
Choose a tool in the left navigation, or press ⌘K (Ctrl+K on Windows and Linux) and search for a word such as email, logo, dither, slide or terminal. The navigation groups tools into Brand, Motion, Foundations, Expressions and Components. The Studio overview lists every tool.
4. Compose and inspect
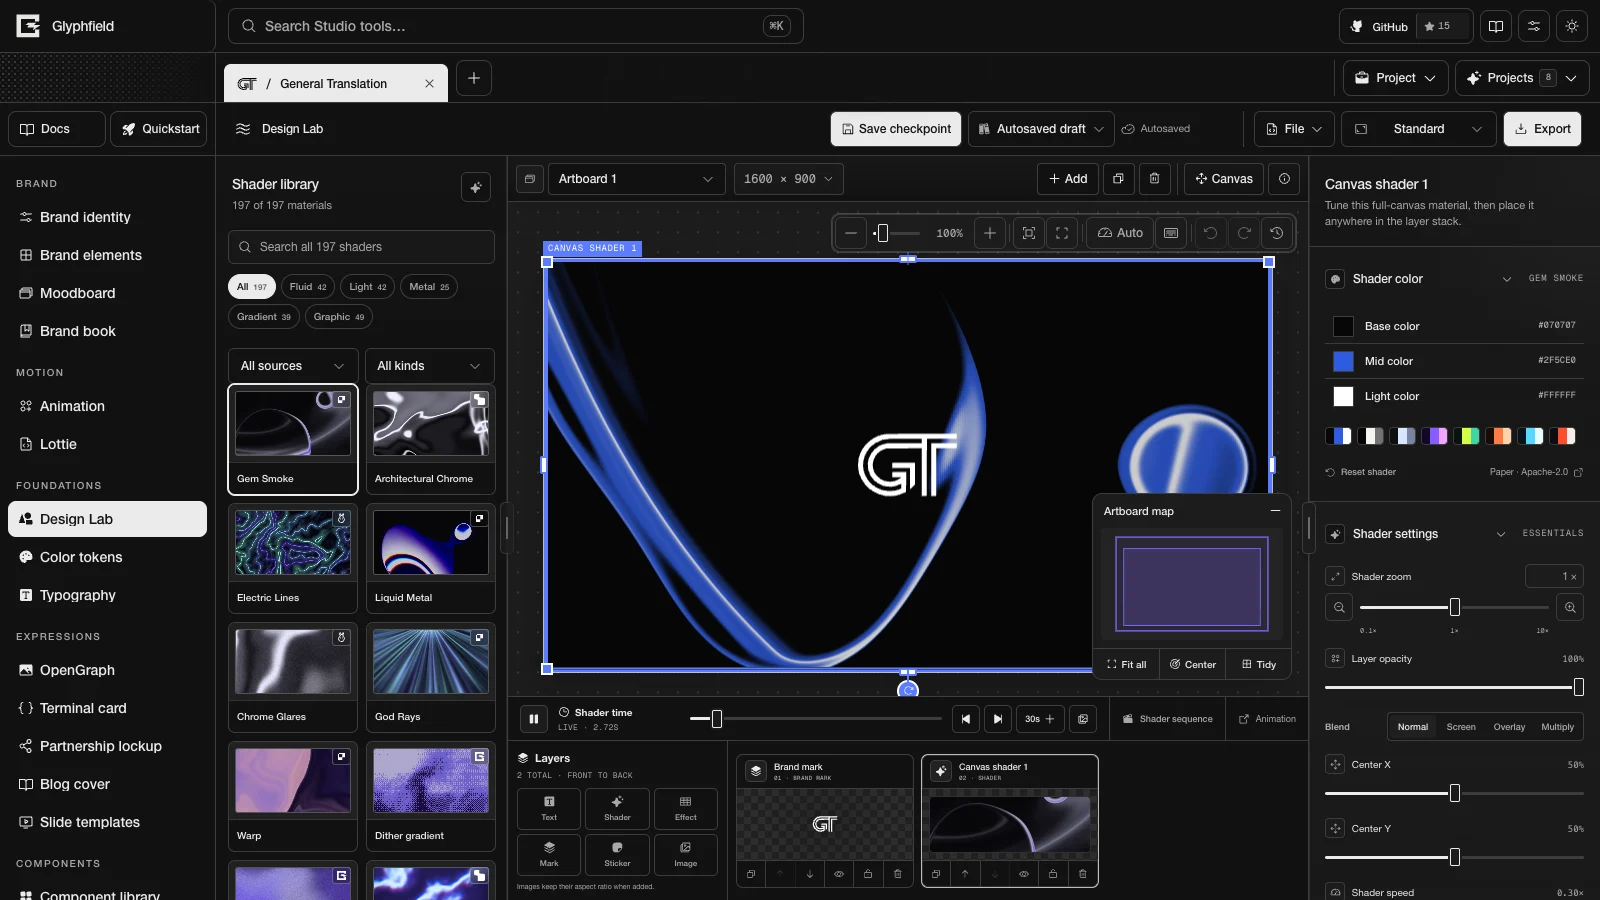
Most tools share one layout:
| Area | Purpose |
|---|---|
| Left sidebar | Libraries, catalogs and sources |
| Center canvas | The artifact. Scroll to zoom, drag empty space to pan, and use the toolbar to fit or reset the view |
| Right inspector | Settings of the selected layer or of the tool |
| Tool header | Saving and export |
| File → Edit source code | The artifact's exact JSON in a drawer. Apply code validates and applies it, and an invalid edit leaves the artifact unchanged |
Visual customization in the Studio header changes the theme, accent color, canvas background, corners, density, motion, tooltips and interface font of the Studio. These settings do not change brand colors in an artifact. Visual settings lists every option.
For a first composition, open Design Lab, the layered composition tool:
- Open Artboard setup and choose an output size, for example Wide 1600 × 900 or OG Social 1200 × 630.
- Add text (T), a brand mark (M) or an image (I), or choose a shader from the Shader Library in the left sidebar.
- Select a layer to edit its geometry, appearance, opacity and material.
- Scrub shader time to choose an exact frame, and select Capture shader frame to keep it.
- Select Save checkpoint before you make variants.
5. Export
Each tool has its own export actions.
| Format | Produced by |
|---|---|
| PNG | Design Lab, Animation (poster frame), Lottie (frame), Brand elements, Moodboard and the five expression tools |
| JPG | Design Lab |
| GIF | Design Lab, Animation and Lottie |
| MP4 | Design Lab, Animation (with its audio track) and Lottie |
| Brand book (print) and Slide templates | |
| SVG | The five expression tools, Moodboard, and HTTP templates and backgrounds |
| HTML | Brand element emails |
| JSON | Identities, brand element briefs, Design Lab and Animation project files, and Lottie source |
| Tokens and code | Color tokens, Typography, Component library and the brand kit |
Most exports open Review export first. It shows the finished file with its dimensions, file size and editable file name. The download button names the format, for example Download PNG. Check clipping, background, text contrast and motion in that preview. After the download, open the file in its target application and confirm that it is not empty.
Continue with Download and use artifacts, Source code editing and Source formats.
Glyphfield documentation
Learn how Glyphfield turns one brand identity into designs, motion and code, and find the guide for the Studio, the agent interfaces or the reference.
Studio overview
Find every Studio tool by name and ID, manage projects and tabs, search tools, change the visual settings, and learn where the Studio saves your work.